How to setup Next.js, Apollo GraphQL, TypeScript, Styled Components and Server side rendering in 4 simple Steps#
In this Article I will show you how to create a frontend with many of the most powerful web technologies that are there right now.
We will be creating a simple job list with data provided by graphql.jobs.
Before we start let’s get a little bit more familiar with the tech stack we are going to use.
TypeScript is an open-source programming language developed and maintained by Microsoft. It is a strict syntactical superset of JavaScript, and adds optional static typing to the language.
Next.js is a production ready web framework for creating server side rendered react frontends.
Apollo GrpahQL is Apollos implementation of GraphQL, an open-source data query and manipulation language for APIs.
Styled Components are one of the new ways to use CSS in modern JavaScript. It is the meant to be a successor of CSS Modules, a way to write CSS that’s scoped to a single component, and not leak to any other element in the page.
What is Server Side Rendering or SSR?#
Sever Side Rendering is a technique where you render a client side application (e.g. a single page react app) on the server and ship the fully loaded DOM to the client.
This technique gives your page grater SEO power and performance than a traditional single page application (SPA) since clients (web browsers and crawlers) don’t need to execute JavaScript to get a full view of the DOM.
yarn add with npm install --save.Step One: Setup Next.js#
First, let’s create a new project:
mkdir killer-frontendcd killer-frontendyarn init -yyarn add react react-dom nextmkdir pages
Now, open the package.json file in the root of your new project and add the following scripts section:
{"name": "killer-frontend","version": "1.0.0","main": "index.js","license": "MIT","dependencies": {"next": "^9.1.6","react": "^16.12.0","react-dom": "^16.12.0"},"scripts": {"dev": "next","build": "next build","start": "next start"}}
We can now use the commands yarn dev, yarn build and yarn start.
In development you probably always want to use yarn dev, since it starts your project in the development mode with pre-enabled hot reload.
In production you first have to generate a production build with yarn build and then let it be served by Next.js with yarn start. This method takes more time but will grant you much greater performance.
Let’s run yarn dev and visit http://localhost:3000/. You should see a 404, since we don’t have any pages yet. Don’t worry, we will change that soon.
Step Two: Add TypeScript#
I know, this step sound like pain, but adding TypeScript to a Next.js project is incredibly straight forward.
Stop your Next.js dev server and create an empty tsconfig.json file.
touch tsconfig.json
Then start the dev server. Next.js will now recognize that you want to use TypeScript and tells you what to do next.
Let’s follow the instructions and add the missing packages:
yarn add --dev typescript @types/react @types/node
Note the --dev flag to install these packages as devdependencies.
We are ready to go! Let’s create a simple Homepage. Go ahead and create a index.tsx file in the /pages directory:
touch pages/index.tsx
And:
import React from "react"const Index = () => (<div><h1>GraphQL Job Board</h1><p>A list of open GraphQL jobs.</p></div>)export default Index
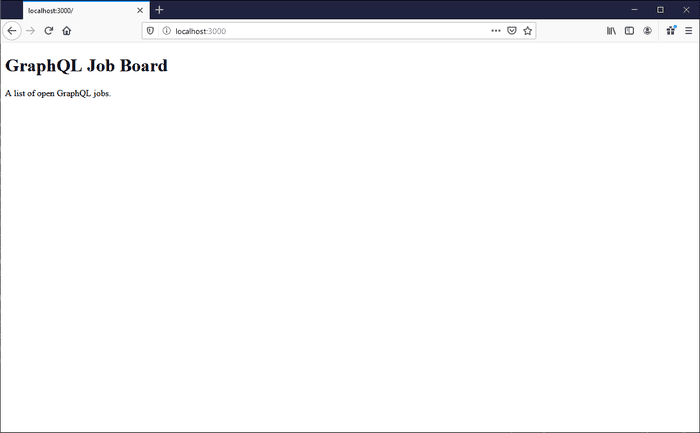
Start your server and visit http://localhost:3000/.
There you have it. Your first page! 🍻
Step Three: Setup Styled Components#
To setup Styled Components we first have to add some packages:
yarn add styled-componentsyarn add --dev @types/styled-components babel-plugin-styled-components
Since Next.js uses babel internally we have to configure babel to extract and transpile our Styled Components template code from our components.
Therefore we have to create a .babelrc file in our project root.
touch .babelrc
Then add the following babel config:
{"presets": ["next/babel"],"plugins": [["styled-components",{"ssr": true,"displayName": true,"preprocess": false}]]}
This babel plugin adds a unique identifier to each styled component to avoid checksum mismatches. This is great for stability but could get uns into warning-hell, since it could happen that the same class gets a different name on the server than on the client. Fortunately we can avoid this problem by setting ssr to true.
The displayName option adds the component name to the generated CSS class to make it easier for debugging.
preprocess is an experimental feature that we don’t need in our case.
Now we are ready to render our components on the server side. In order to do that we have to create a _document.tsx file in the pages/ directory.
Feel free to read more about Next.js magic files.
touch pages/_document.tsx
And add the code that will handle the server sided rendering of our styled components:
_document.tsx123456789101112131415161718192021222324252627282930313233343536373839404142434445464748import React from "react"import Document, { Head, Main, NextScript } from "next/document"import { ServerStyleSheet } from "styled-components"export default class MyDocument extends Document<any> {static async getInitialProps(ctx) {const sheet = new ServerStyleSheet()const originalRenderPage = ctx.renderPagetry {// wraps the collectStyles provider around our <App />.ctx.renderPage = () =>originalRenderPage({enhanceApp: App => props => sheet.collectStyles(<App {...props} />),})// extract the initial props that may be present.const initialProps = await Document.getInitialProps(ctx)// returning the original props together with our styled components.return {...initialProps,styles: (<>{initialProps.styles}{sheet.getStyleElement()}</>),}} finally {sheet.seal()}}render() {return (<html><Head>{this.props.styleTags /*rendering the actually stylesheet*/}</Head><body><Main /><NextScript /></body></html>)}}
Let’s create a global style to test our configuration:
_app.tsx123456789101112131415161718192021222324252627282930313233343536373839404142import React from "react"import App from "next/app"import Head from "next/head"import { ThemeProvider, createGlobalStyle } from "styled-components"export interface ITheme {niceBlack: string;}export interface IThemeWrapper {theme: ITheme;}export const theme: ITheme = {niceBlack: "#001F3F",}const GlobalStyle = createGlobalStyle<IThemeWrapper>`body {margin: 0 auto;color: ${props => props.theme.niceBlack};}`export default class MyApp extends App {render() {const { Component, pageProps } = this.propsreturn (<React.Fragment><Head><title>GraphQL Job Board</title><meta name="viewport" content="width=device-width, initial-scale=1" /></Head><ThemeProvider theme={theme}><GlobalStyle /><Component {...pageProps} /></ThemeProvider></React.Fragment>)}}
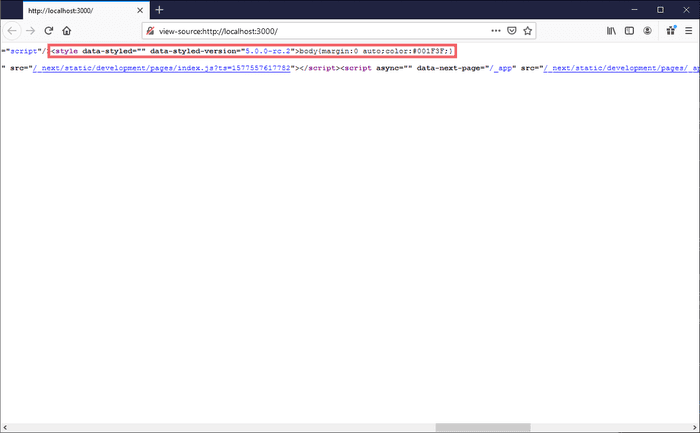
If we restart our server we can verify that the stylesheet is being rendered on the server side:
And there we go. You have successfully implemented Styled Components with SSR! 👌
Step Four: Setup Apollo GraphQL#
I will assume that you know the fundamentals of GraphQL. If not, I highly recommend you reading this article.
We will be using Apollos implementation of GraphQL since it’s well maintained and battle proofed.
The concept#
In order to keep our code quality clean we will be writing our queries and mutations in the pages of our Next.js project only and pass the data we need down to our components as props.
We will use the useQuery hook from the @apollo/react-hooks package to write our queries. This makes implementing server side rendering a no-brainer and works very well in our react context.
If a client (e.g web browser) makes a GET request to one of our pages the idea is that we will evaluate all queries that need to be run on that page and fire them on the server side. We take the data returned by those queries and re hydrate the DOM with it. Then we send the fully re hydrated DOM back to the client.
Since this isn’t a GraphQL Server tutorial we will be using a public GraphQL endpoint to have some sample data. In our case this will be https://api.graphql.jobs/.
The implementation#
Let’s start by installing all the packages we need:
yarn add @apollo/react-hooks apollo-boost graphql node-fetch next-with-apollo
next-with-apollo is a provider that will handle the re hydration in our Next.js context. If you want you could create your own implementation but there is no need to reinvent the wheel ;)
We can now create our Apollo client:
hooks/withApollo.ts12345678910import withApollo from "next-with-apollo"import ApolloClient, { InMemoryCache } from "apollo-boost"export default withApollo(({ initialState }) =>new ApolloClient({uri: "https://api.graphql.jobs/",cache: new InMemoryCache().restore(initialState || {})}))
initialState is the accumulated data returned by the queries. It will be passed to the cache as the initial data.
After that we have to make some additions to the _app.tsx file to add our own withApollo provider:
_app.tsx12345678910111213141516171819202122232425262728293031323334353637383940414243444546474849505152535455565758import React from "react"import App from "next/app"import Head from "next/head"import { ThemeProvider, createGlobalStyle } from "styled-components"import { ApolloProvider } from "@apollo/react-hooks"import withApollo from "../hooks/withApollo"import { ApolloClient, NormalizedCacheObject } from "apollo-boost"export interface ITheme {niceBlack: string;}export interface IThemeWrapper {theme: ITheme;}export const theme: ITheme = {niceBlack: "#001F3F",}const GlobalStyle = createGlobalStyle<IThemeWrapper>`body {margin: 0 auto;color: ${props => props.theme.niceBlack};}`// since "apollo" isn't a native Next.js prop we have to declare it's type.interface IProps {apollo: ApolloClient<NormalizedCacheObject>;}// adds our custom props interface to the generic App base class.class MyApp extends App<IProps> {render() {// instead of creating a client here, we use the rehydrated apollo client provided by our own withApollo provider.const { Component, pageProps, apollo } = this.propsreturn (<React.Fragment><Head><title>GraphQL Job Board</title><meta name="viewport" content="width=device-width, initial-scale=1" /></Head>{/* adds the apollo provider to provide it's children with the apollo scope. */}<ApolloProvider client={apollo}><ThemeProvider theme={theme}><GlobalStyle /><Component {...pageProps} /></ThemeProvider></ApolloProvider></React.Fragment>)}}// before exporting our App we wrapp it with our own withApollo provider to have access to the our rehydrated apollo client.export default withApollo(MyApp)
All changes are marked with comments.
We can now write a query to get all jobs from our endpoint. The best place to do this is in the pages/index.tsx file:
index.tsx123456789101112131415161718192021222324252627282930313233import React from "react"import JobList from "../components/JobList"import { useQuery } from "@apollo/react-hooks"import { gql } from "apollo-boost"const Index = () => {// our query that defines the attributes we want to get.const JOBS_QUERY = gql`query {jobs {idtitleapplyUrlcompany {name}}}`// the hook that calls the query.const jobs = useQuery(JOBS_QUERY)return (<div><h1>GraphQL Job Board</h1><p>A list of open GraphQL jobs.</p><JobList jobs={jobs?.data?.jobs || []} /></div>)}export default Index
As you can see we pass the returned jobs or an empty array as a prop to our JobList component since jobs.data.jobs isn’t always defined.
Tip: “?” is a safe navigation operator. We have to use it here because
jobs.datacan be undefined at a certain point in time.
The last thing left to do is to build our JobList component:
JobList.tsximport React from "react"import styled from "styled-components"// this interface defines the shape of the data returned by the jobs query.export interface IJob {id: string;applyUrl: string;title: string;company: {name: string;}}interface IProps {jobs: IJob[];}const List = styled.ul``const ListItem = styled.li`margin-bottom: .5rem;`const JobList = ({ jobs }: IProps) => {const listItems = jobs.map((job) => {return (<ListItem key={job.id}>{job.title} by {job.company.name} [<a href={job.applyUrl} target="_blank">Apply</a>]</ListItem>)})return (<List>{listItems}</List>)}export default JobList
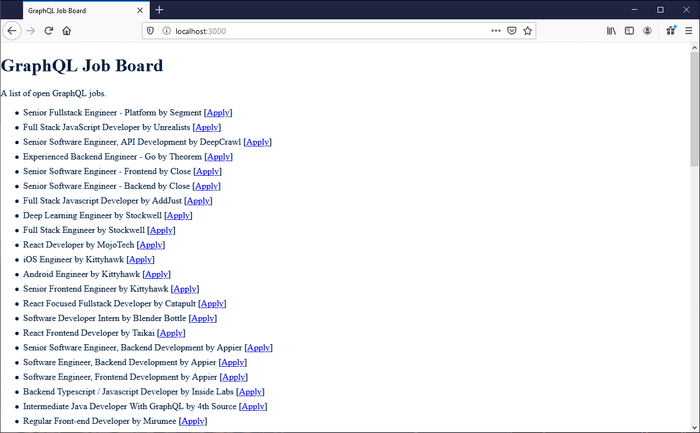
And here is the final result:
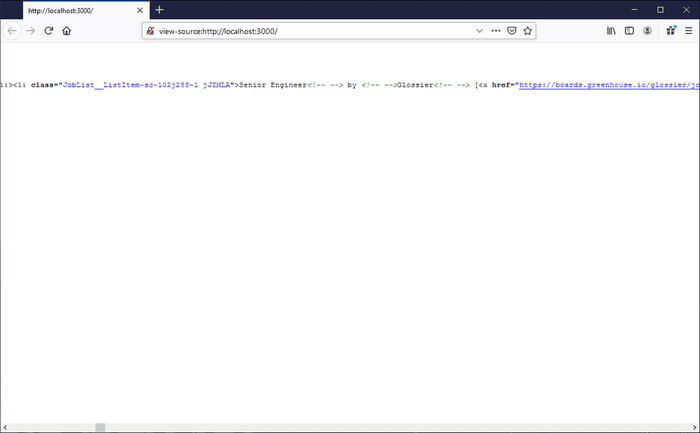
If we take a look at the source code we can see that everything was re hydrated on the server side:
And that’s it. You have created a powerful frontend with many of the most powerful web technologies that are on the market right now. 🎉
Source code: https://github.com/maxbause/next-graphql-styled-components-ts-boilerplate
Cheers, Max.
